
Workshop guide
Fluidd for beginners: the Klipper interface explained.
Fluidd is the browser dashboard that makes a Klipper printer feel less like a black box. It shows the job, the camera, temperatures, files and machine state in one place—and it also exposes the parts of the printer that deserve a little respect. The trick is knowing which controls are everyday tools and which ones should stay in reserve until you understand what they change.
1browser dashboard for the printer
10areas worth knowing
1rule: observe before changing
The everyday screen
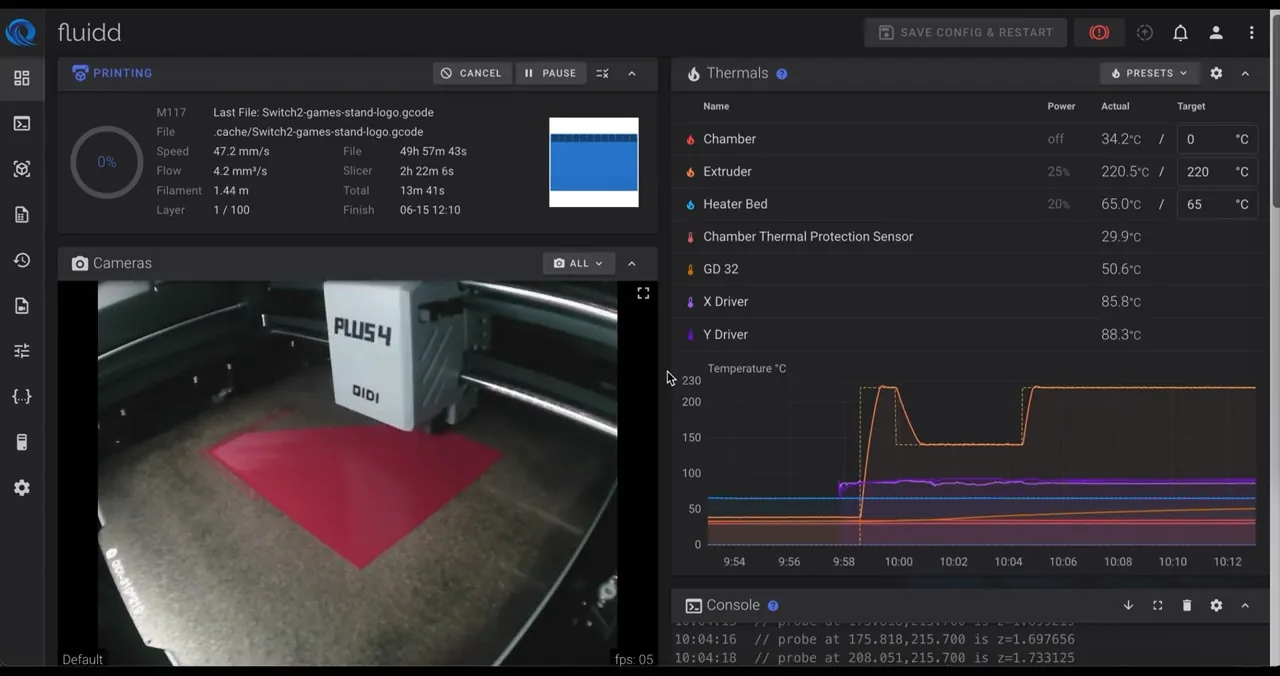
The Dashboard is the place to watch, warm up and intervene.
For normal use, Fluidd’s Dashboard is almost all you need. It brings together the current print, elapsed time, layer and material information, thermal targets, live temperature graphs and any connected camera. It is the useful middle ground between standing in front of a touchscreen and opening several separate tools just to see whether the job is healthy.
Start by getting comfortable with the passive information: the actual versus target temperatures, the graph’s behaviour after a heat-up, print progress and the camera. Then use the obvious active controls—preheat, pause, resume and cancel—when the job calls for them. Fluidd is most valuable when it helps make a calm decision early, rather than when it provides another way to hover over a printer.
A temperature that has reached its target can still be settling. The graph reveals whether a heater is stable, cycling hard or behaving unexpectedly before that becomes a print-quality problem.
Before and after a job
G-code Preview, Files and History turn a print into a record.
The G-code Preview is the last useful check before committing to a job. It lets you inspect the toolpath, layers and print sequence rather than trusting an STL thumbnail alone. For a long print, that quick look can catch an unexpected support, an awkward orientation or a sliced file that is plainly not the one you meant to send.
Files is the printer-side library: upload G-code, sort it into folders and start a chosen job from the browser. History gives the useful aftermath—completed, cancelled and failed jobs with their basic details. Together they make it easier to answer a practical question: what was printed, with which file, and did it succeed? That is much better evidence than a vague memory when a profile needs attention.
A record, not a requirement
Timelapse is useful when it earns its place in the workflow.
Fluidd can collect frames from a supported camera and render a finished timelapse after a print. It is enjoyable, but it can also be practical: a short record helps confirm when a problem started, whether a corner began lifting or when an enclosure change affected a print. Treat it as an optional diagnostic and sharing tool, not something that must run on every job.
Check the render settings before leaving it enabled by default. Frame rate, duplicate frames and thumbnail generation affect the result and the storage used. A simple, consistent setting is usually more useful than chasing a cinematic clip from every calibration cube.
The page people overuse
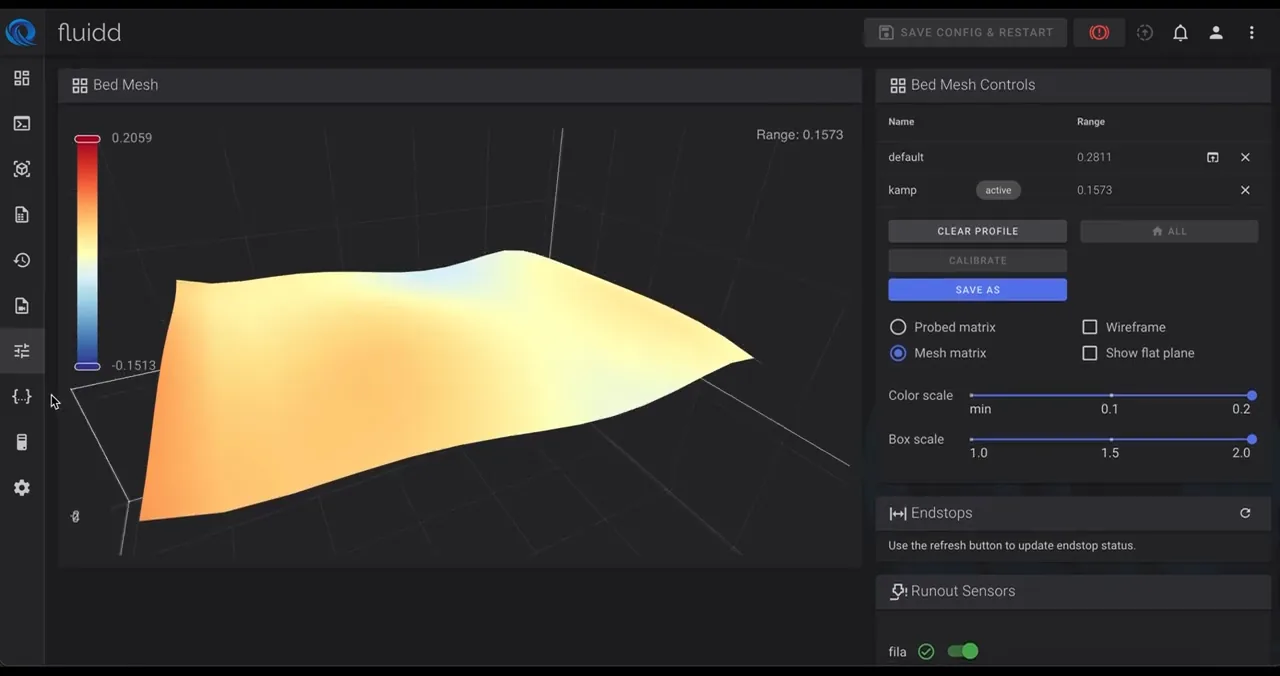
Bed Mesh tells you what the surface is doing. It does not cure everything.
Run a mesh only after the printer has reached the temperature at which it will print and the basic mechanics are sound. Fluidd shows the measured surface as a map, along with its range and saved profiles. That view is excellent for spotting a meaningful change over time or confirming that the printer has a usable compensation profile loaded.
Do not treat every contour as a fault to chase. A mesh is there to compensate for small variation. If the range is suddenly far worse, first look for the ordinary causes: debris on the build plate, a loose probe or gantry, cold hardware, or a mechanical adjustment that changed the geometry. Then calibrate, save the appropriate profile and let the printer use it consistently.
The powerful pages
Console, Configuration and System Info are for understanding—not improvising.
Console sends real commands
The Console is invaluable for checking what Klipper reports and for running a command you understand. It is not a place to paste a random command from a forum mid-print. Read the response, know what the command affects and keep the first experiments slow and supervised.
Configuration belongs in a deliberate routine
Fluidd can expose the printer configuration and make edits convenient. Make one considered change, save it, restart only when appropriate and test the result. Keep a backup of a known-good configuration before editing anything involved in heaters, motors, limits or safety.
System Info is a quick health check
The system page surfaces storage, processor, memory, services, logs and controller information. It is the first sensible stop when Fluidd feels slow, a camera stops updating or a printer behaves differently after an update.